I've debated with myself for ages about whether or not to travel this road. Soldering is a whole new animal, one I'm not all that familiar with. I did a little soldering in collage while getting my fine arts degree, but it was with aluminum (a very soft metal) and using an iron (not a torch). Soldering silver would require much more. The equipment is expensive and there are safety concerns to be considered. After talking with another designer friend and reading a bunch of articles and blogs, I decided it was worth the risk.
The first thing to do was to decide what I needed. This is where my designer friend Kathy came in very handy! I met up with her, my Rio Grande tool catalog in hand, and we poured over the pages. It was a lot of explaining on her part and a lot of questions on mine. Eventually, I came up with a list of things to get. They included a small butane torch much like to ones you use in the kitchen, a soldering block, charcoal blocks, three pairs of tongs, a third hand base, soldering pick, flux, pickling solution, iron oxide, a small crock pot, and a sturdy baking sheet to hold it all. Oh, and sterling wire and solder, of course. It was a lot of stuff and it cost a good chunk. Considering I'd never done this before, would it be worth the investment? Everything I needed was in various online carts waiting for the final click, after a brief 'I hope this is a good choice' moment, I hit the 'order' buttons. Decision made.
Over the next week, the packages trickled in from Amazon, House of Gems, and finally the big one from Rio. It felt like Christmas morning, I got some popcorn!
 |
|

Getting it all set up was relatively straight-forward. After talking with Kathy at such length, I knew what each item was meant to do and I'd spent days figuring out in my head how I would set everything up. Much of this thought revolved around how to deal with the various safety issues that come with soldering with a torch. This was not something I could do at my desk in our living room while snuggled in a blanket (my usual jewelry making set-up). I would be using fire and dealing with things that are messy, toxic, and hot. Many designers have a studio or garage-type set up they can work in. I live in a small, one bedroom apartment that simply does not offer me such luxuries. I do however, have a kitchen, set up to deal with fire. The safest place to use fire in the apartment is the stove top, the area is already equipped to handle the flames from the burners. The heavy baking sheet provides a barrier between the equipment and the stove, and a thorough wipe down of the counter top after each session would keep my food from being contaminated. Everything would fit neatly on the sheet and slide onto its own shelf in the closet, where it can be easily pulled out again. Is this an ideal set up? No, ideally I'd have a studio where it could be set up safely and permanently. But I don't, I have to work with what I have, and this works for me.

Now, I can get to work! Kathy had explained the process in depth: form the wire into the shapes you want, position them on the charcoal block(which with reflect heat back onto the work, making it heat quickly and evenly), put a little flux paste on the joints, add the solder to the joints(that comes in wire form, best to flatten and pre-cut pieces, you only need a tiny bit), use the torch to heat the piece until the solder melts and flows, be careful not to over heat and melt the piece. Use tweezers to lift the piece and drop into the hot pickling solution in the crock pot, wait. Use copper tongs only(anything else will plate the work) to fish the piece out of the pot and allow to dry. It sounds rather simple, or maybe it doesn't. I learned very quickly this requires a lot of finesse. Getting the wire, flux, and solder positioned just right. Knowing the limit for how many joints you can reasonably do in one go. Moving the torch across the metal, heating the areas you want, pulling away at exactly the right moment so it doesn't melt but leaving it on long enough to get a good join. You really have to get to know your materials and develop a feel for your tools. I was having the time of my life!

I picked it up fairly quickly, after a few attempts joining simple jump rings I was ready to try something a little more challenging. First, a lotus flower, that looks more like the Adidas logo (not pictured) than a flower, but technically a good soldering job! I attempted harder and harder pieces. I did end up with a few melted and mangled attempts, but for the most part I felt I was doing well! Kathy had the best reaction to seeing my new work. She told me I was doing work far too advanced for someone doing it for the first time. My heart soared! This was surely the beginning of many wonderful creations! This was one of my favorites!
I set to work making these pieces into finished jewelry. I've rarely been so excited about new designs. Several of these are remakes, because they sold at my recent shows before I could put them for sale online!
So it was a good decision after all! Now that I've got a break in shows, I'm finally getting these on Etsy.
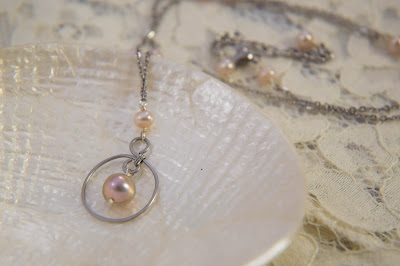
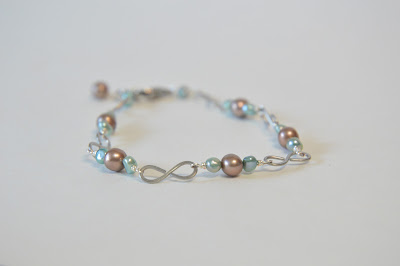
This is the first of my soldered pieces, it's rather simple, but elegant too at the same time. The challenge in creating the five ovals really came with getting them the right size and getting them laid out to solder just right. It's a very exact and geometric design and the pieces kept moving around on me! I'm happy with the way it came out and I really feel the mauve pearls just make it! Click
here, to find it on Etsy!
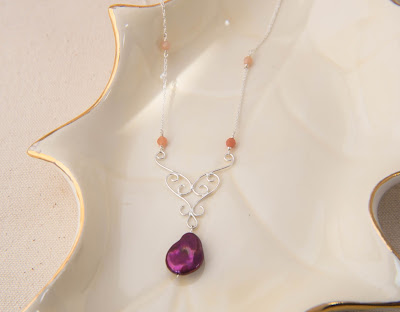
I really struggled with this design, I actually had more of those curls that I left out because I didn't want the piece to be too big. I do love the combination of the vibrant magenta pearl and the peach moonstone. Once it all came together I think I got the Art Nouveau look I was going for. Click
here to fond it on Etsy!
This one is my husbands favorite! He keeps taking it from me and telling me it's his now! The basic design is one I've seen done before, this is my own version of it! There are pearls in the chain to mirror the cloud piece and the drop shaped blue quartz crystals make the perfect rain drops! Click
here to find it on Etsy!
Cala lilies are beautiful flowers, and the magenta and mauve colors go beautifully with it! My mom actually thought the soldered piece was a peace lily, and that's ok! The two flowers are so similar looking, which ever you'd like it to be is what it is! Click
here to find it on Etsy!
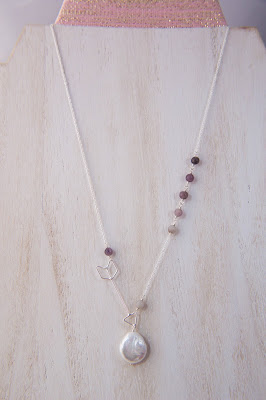
Arrows are really in style right now! This arrow points right to this gorgeously lustrous coin pearl. The purple beads are agate, which comes in nearly every imaginable color, these range in color from a dark, almost black purple to a really soft grey, creating an ombre effect. It's also asymmetrical, which actually creates some balance, moving the agate beads up the chain a bit keeps it from being heavy at the bottom. Click
here to find it on Etsy!
Chevrons are the ultimate minimalist element for jewelry! This one is so simple, and adding the garnets with the peacock pearls with those nice red and purple undertones, dress up the cheveron just enough! Click
here to find it on Etsy!
This piece is truly one of my favorite things I've ever made. It' right up there with my
spiraling necklaces! I've had the immense pleasure of having a pair of barn swallows nest right outside my back door. Getting to watch those baby birds grow up and learn to fly was so wonderful! I would sit on my balcony and watch the adult swallows soar and dive through the sky. I've been wanting a swallow necklace ever since! Being able to solder allowed me to finally do it! The pearls are lovely, the citrine crystals remind me of the nice orange belly of the birds, and the shape of the swallow looks like it's just pulling out of a dive. I love it. Click
here to find it on Etsy!
This one is a tiny little feather! The two colors of pearl I choose for this, the magenta and turquoise, along with the feather are inspired by the southwest Native American art and jewelry. Its a really simple design, and sometimes simple is just what you need! Click
here to find it on Etsy!
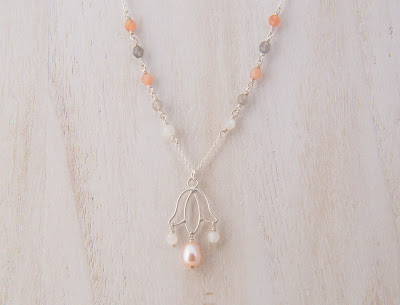
Who doesn't love tulips? They're one of the first flowers you see in the spring and they come in all different colors! My tulip necklace is made with pink pearls and moonstone in peach, a lovely warm grey, and a soft white. The soldered tulip is turned upside down to create a chandelier effect. It makes a perfect floral bridal necklace! Click
here to find it on Etsy!
This is my biggest accomplishment in soldering this far! Solder comes in hard, medium, and soft. Each has a different melting point, so you have three rounds of soldering to get everything together. This piece took more than three rounds! Heating the piece just enough and then pulling the torch away at just the right moment so I didn't melt the existing joints was so tricky! The result is this beautiful fern branch! The pearls I choose to go with it are mauve and a gorgeous chocolate brown that give the piece a wonderful earthy feel. I can't get enough of it! Click
here to find it on Etsy!
In creating jewelry I've learned how important it is to keep expanding your skill set, keep innovating, keep pushing to make new and exciting pieces. If you don't, it's so easy to fall into a rut making different versions of the same design. Soldering has opened up an entirely new avenue of design and I'm excited to see where it will lead me and what new skills I can build off it!


